
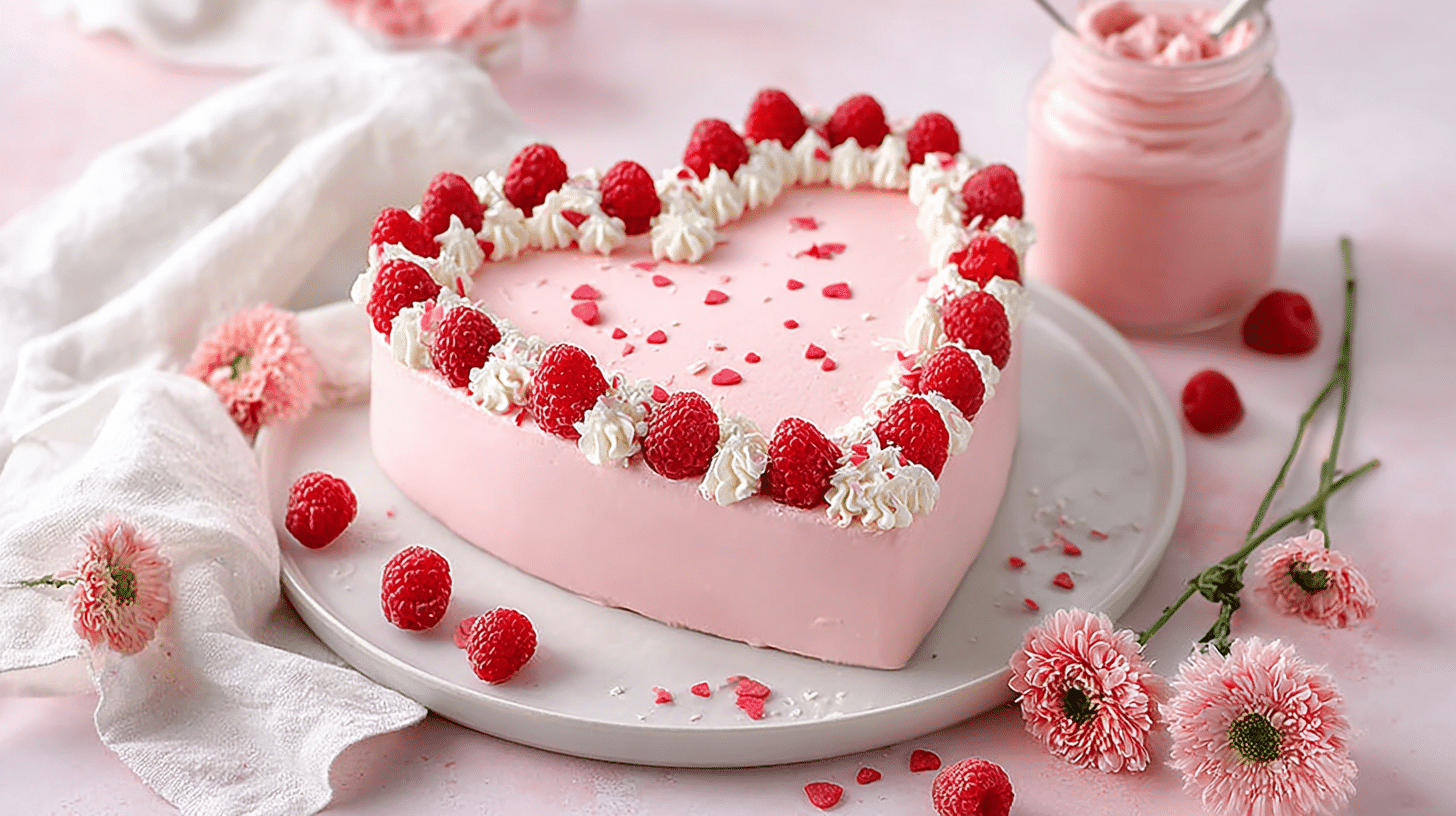
Soft, fluffy, and beautifully charming, Easy Heart Shaped Cake Tutorial for Sweet Celebrations turns a simple cake into a meaningful centerpiece. The aroma of vanilla fills the kitchen as tender layers bake to golden perfection, ready to be shaped into a sweet symbol of love. What makes Easy Heart Shaped Cake Tutorial for Sweet Celebrations special is how approachable it feels. You do not need specialty pans or advanced skills. With everyday tools and clear guidance, this cake becomes stress free and fun. Whether for anniversaries, birthdays, or Valentine’s Day, you’ll learn how to bake, shape, frost, and decorate a heart shaped cake with confidence.
Why You’ll Love This Recipe
This Easy Heart Shaped Cake Tutorial for Sweet Celebrations focuses on simplicity without sacrificing visual impact. You get a moist crumb with soft edges that slice cleanly, paired with creamy frosting that spreads smoothly. The texture contrast between fluffy cake and silky icing makes every bite satisfying. One of the biggest advantages is flexibility. You can use box mix or homemade batter and still achieve bakery style results. This tutorial removes the intimidation factor from shaped cakes and replaces it with clear, logical steps. If you enjoy heart cake decorating ideas or simple celebration cake recipes, this method fits perfectly into your routine while delivering impressive results.
Ingredients
The ingredients for Easy Heart Shaped Cake Tutorial for Sweet Celebrations are simple and widely available, making this cake accessible anytime inspiration strikes.
For the cake:
1 box vanilla cake mix or homemade equivalent (approx. 430 g)
Ingredients listed on the cake mix package or homemade recipe
Butter or nonstick spray for greasing pans
For the frosting:
1 cup unsalted butter, softened (226 g)
3 to 4 cups powdered sugar (360 to 480 g)
2 to 3 tablespoons heavy cream or milk (30 to 45 ml)
1 teaspoon vanilla extract
Optional decorations:
Food coloring
Sprinkles or edible pearls
Fresh berries or chocolate shavings
Pro Tips
To master Easy Heart Shaped Cake Tutorial for Sweet Celebrations, start with evenly baked cakes. Level the tops once cooled to ensure stable stacking. Chill the cake layers before shaping to reduce crumbs and improve control. When frosting, apply a thin crumb coat first, then chill again before final icing. This step locks in crumbs and creates a smooth surface. Use an offset spatula for precision around curves. These small techniques make the final cake look polished and professional.
Instructions
Step 1
Preheat oven according to cake recipe instructions. Grease one 8-inch round pan and one 8-inch square pan.
Step 2
Prepare cake batter following recipe directions. Divide batter evenly between the two pans.
Step 3
Bake cakes until a toothpick inserted into the center comes out clean. Cool completely on a wire rack.
Step 4
Once cooled, level the tops of both cakes with a serrated knife for even thickness.
Step 5
Cut the round cake in half vertically to create two equal semicircles.
Step 6
Place the square cake on a serving board as a diamond shape. Position the semicircles on the top two sides to form a heart.
Step 7
Secure pieces together with a small amount of frosting. Chill for 20 minutes to set the shape.
Step 8
Prepare frosting by beating butter until smooth. Gradually add powdered sugar, cream, and vanilla until fluffy.
Step 9
Apply a thin crumb coat over the entire cake, following the heart shape carefully. Chill again for 15 minutes.
Step 10
Frost the cake with remaining icing, smoothing edges and enhancing curves. Decorate as desired.
These steps ensure Easy Heart Shaped Cake Tutorial for Sweet Celebrations comes together smoothly with clean lines and beautiful presentation.
Variations
You can easily adapt Easy Heart Shaped Cake Tutorial for Sweet Celebrations to suit different tastes and dietary needs. Swap vanilla cake for chocolate or red velvet for a more dramatic look. Use cream cheese frosting instead of buttercream for tangy contrast. For a lighter option, fill layers with whipped cream and fresh fruit. Gluten free cake mixes also work well with this shaping method, making it inclusive for all guests.
Storage/Serving
Store Easy Heart Shaped Cake Tutorial for Sweet Celebrations covered at room temperature for up to 2 days or refrigerated for up to 5 days. Bring to room temperature before serving for best texture. Serve slices with fresh berries, a drizzle of chocolate sauce, or a scoop of ice cream. This cake works beautifully as a centerpiece dessert for romantic dinners or family gatherings.
FAQs
Do I need a heart shaped pan?
No, this method uses round and square pans only.
Can I make this cake ahead of time?
Yes, bake layers a day ahead and frost before serving.
Does this work with box mix?
Absolutely, box mix works perfectly.
How do I keep crumbs out of the frosting?
Chill layers and use a crumb coat.
Can kids help with this cake?
Yes, shaping and decorating are kid friendly.
Conclusion
This Easy Heart Shaped Cake Tutorial for Sweet Celebrations is comfort food at its finest — soft, fluffy cake paired with smooth frosting and a charming homemade shape. It’s the kind of dish that turns simple moments into memorable celebrations and makes any occasion feel extra special.