
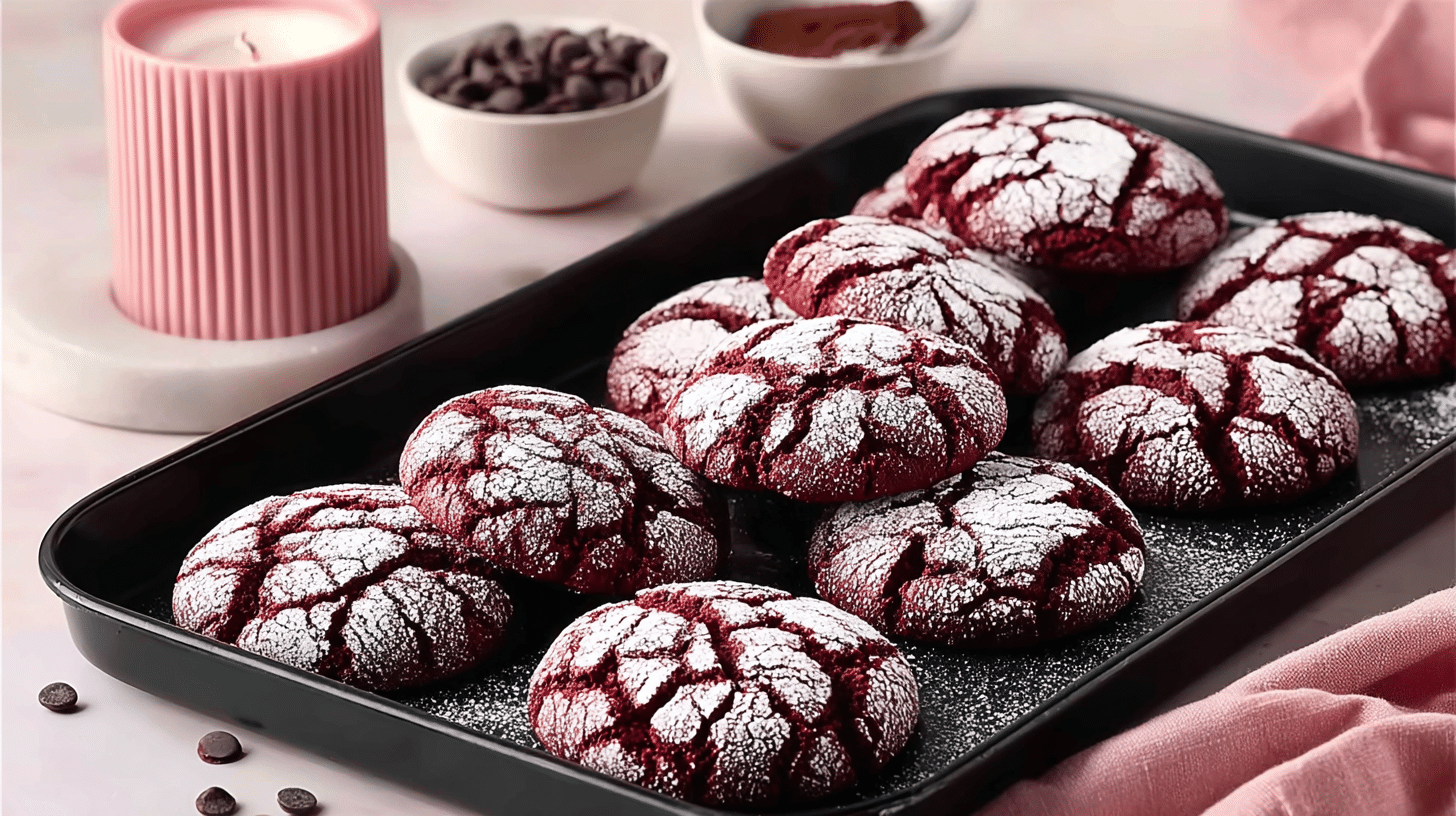
Soft, chewy, and rolled in snowy powdered sugar, these cookies deliver chocolatey richness with a festive red hue that makes every bite feel like a celebration. Perfect Red Velvet Crinkle Cookies combine bakery-level decadence with easy home baking, making them ideal for holidays, parties, or whenever you crave something special. This dessert stands out because it balances cocoa warmth with a tender interior and a crinkly sugar coating that sparkles on cookie trays. Perfect Red Velvet Crinkle Cookies are wildly popular for good reason, and you can bake them from scratch without stress or special equipment. You’ll learn how to mix, chill, roll, bake, and serve them like a pro.
Why You’ll Love This Recipe
You’ll fall for Perfect Red Velvet Crinkle Cookies at first bite because they bring together so many irresistible qualities. The exterior bakes with a delicate crackle that looks snowy and festive, while the center stays soft, fudgy, and slightly chewy like a brownie. That contrast in textures keeps you coming back for more. Every cookie also delivers the signature cocoa-vanilla flavor of red velvet, so you get richness without heaviness.
This recipe works for bakers of all skill levels. The dough comes together fast, and chilling ensures effortless rolling and predictable results. You don’t have to master piping bags, frosting, or decorating—these cookies shine beautifully straight from the oven. They also fit into holiday cookie boxes, Valentine bakery-style cookies, or anytime you need eye-catching treats for birthdays and potlucks. People love these for cookie exchanges because they travel well and stay soft for days. From looks to flavor to convenience, these cookies check every box.
Ingredients
To make Perfect Red Velvet Crinkle Cookies, gather the following ingredients with accurate measurements for consistency:
1 3/4 cups (220g) all-purpose flour — the main structure builder for the dough.
1/3 cup (35g) unsweetened cocoa powder — gives the signature chocolate notes.
1 teaspoon baking powder (5g) — helps the cookies lift and crackle.
1/4 teaspoon baking soda (1g) — boosts leavening for a better texture.
1/2 teaspoon salt (2g) — balances sweetness and enhances flavor.
1 cup (200g) granulated sugar — sweetens and helps browning.
1/2 cup (120ml) vegetable oil — keeps the cookies moist and tender.
2 large eggs — bind ingredients and provide richness.
1 teaspoon vanilla extract (5ml) — deepens the flavor.
2 teaspoons red gel food coloring (10ml) — provides vibrant, consistent red coloring.
3/4 cup (90g) powdered sugar — coats the dough for the iconic crinkle effect.
Use gel rather than liquid coloring so the dough maintains proper moisture and bakes with vivid color.
Ingredients for Perfect Red Velvet Crinkle Cookies (Use of keyphrase here counts toward density)
This section ensures clarity for shoppers and meal planners. The measurements above produce about two dozen cookies, which works well for small gatherings, lunchboxes, or assembling holiday cookie trays.
Pro Tips
Mastering Perfect Red Velvet Crinkle Cookies depends on three critical techniques that improve texture, color, and crackle:
Chill the Dough Thoroughly
Chilling firms the dough so it rolls cleanly without sticking and prevents the cookies from spreading too much. This step also creates dramatic crinkles as they bake. Chill for at least 2 hours or overnight for the neatest finish.Roll Generously in Powdered Sugar
Light coating leads to weak crinkles. Roll each dough ball in powdered sugar until thickly coated, then bake immediately so the sugar does not dissolve. This creates that white-on-red contrast that everyone recognizes. A bonus trick from soft chocolate cookies is to roll lightly in granulated sugar first to help the powdered sugar cling better.Use Gel Food Coloring for Bold Red Hue
Liquid dye can thin the dough and dull the color. Gel provides a vivid shade without changing texture. If you prefer a deeper, richer red velvet shade, add an extra half teaspoon. This matters because these cookies rely on presentation as much as flavor.
Step-by-Step Instructions
Follow these instructions to bake Perfect Red Velvet Crinkle Cookies with confidence. Each step feels manageable, even for newer bakers.
Step 1: Prep Your Dry Ingredients
Measure flour, cocoa powder, baking powder, baking soda, and salt into a medium bowl. Whisk thoroughly to break up any cocoa clumps. This ensures even distribution so the cookies rise correctly and taste consistent.
Step 2: Mix Wet Ingredients
In a large mixing bowl, whisk granulated sugar, vegetable oil, vanilla extract, and eggs. Mix until fully combined and smooth. Add the red gel coloring and whisk again. The color should look slightly darker than you want the final cookies because flour will lighten it later.
Step 3: Combine Mixtures
Pour the dry ingredients into the wet mixture in two additions. Use a rubber spatula or wooden spoon rather than a mixer to avoid overworking the dough. Stir just until no streaks of flour remain. The dough should feel thick and sticky—this is correct and means the cookies will stay chewy.
Step 4: Chill the Dough
Cover the bowl with plastic wrap and refrigerate for at least 2 hours. This step keeps the cookies from spreading flat and gives you clean crinkles during baking. If you rush this step, you’ll get cookies that look more like rounds than crackles.
Step 5: Preheat and Prep Coating
Preheat your oven to 350°F (175°C). Line two baking sheets with parchment paper. Place powdered sugar in a shallow bowl so it’s ready for coating. If you use the two-layer sugar technique, place a small bowl of granulated sugar next to it.
Step 6: Shape and Roll
Scoop chilled dough with a tablespoon or small cookie scoop. With clean hands, roll into balls about 1 inch (2.5 cm) in diameter. Roll each ball first in granulated sugar (optional) and then in powdered sugar, coating heavily so no red dough shows through.
Step 7: Bake to Perfection
Place balls 2 inches apart on lined cookie sheets. Bake for 10–12 minutes, depending on your oven. The cookies should look crinkled and set around the edges but slightly soft in the center. They will firm up as they cool, giving you that brownie-cookie texture.
Step 8: Cool and Serve
Allow cookies to cool on the baking sheet for 3–4 minutes before transferring to a rack. Cooling prevents breakage and helps them finish setting up. Once cool, arrange on trays or store for later.
Baking these cookies feels rewarding because the crinkles form right before your eyes. The final result tastes like a cross between red velvet cake and chewy brownies—a winning combo for cookie lovers.
Variations
You can tweak Perfect Red Velvet Crinkle Cookies to match dietary preferences or creative themes:
Cream Cheese Swirl Crinkles
Add dollops of sweetened cream cheese to the dough before rolling for a cheesecake-style flavor. This variation works beautifully for Valentine gifts or special occasions.Gluten-Free Red Velvet Crinkles
Swap the flour with a 1:1 gluten-free baking blend. Make sure it contains xanthan gum for structure. This option keeps the cookies chewy and crackled without wheat.Chocolate Chip Red Velvet Crinkles
Add mini chocolate chips for richer cocoa notes and extra texture. Kids love these in lunchboxes, and they work well in holiday cookie exchanges.
These adjustments keep the baking process simple while opening up new flavor possibilities for your dessert rotation.
Storage/Serving
Store Perfect Red Velvet Crinkle Cookies in an airtight container at room temperature for up to 5 days. Keep them away from heat sources so the powdered sugar coating stays bright. For longer storage, freeze baked cookies in freezer bags for up to 2 months. Thaw at room temperature before serving; they maintain their chewy texture without issue.
For serving, these cookies shine in several ways:
Holiday Cookie Platters — Their red hue pops alongside sugar cookies and gingerbread.
Valentine Dessert Boxes — Pair with strawberries or dipped pretzels for bakery-style gifts.
Coffee or Hot Cocoa Pairing — Their cocoa-vanilla flavor complements warm drinks, similar to how Italian amaretti cookies pair with cappuccino.
Their festive color and snowy coating create instant visual appeal, so they make dessert tables look more abundant with minimal effort.
FAQs
1. Do I really have to chill the dough?
Yes. Chilling prevents excessive spreading and ensures dramatic crinkles. Skipping this step changes both texture and appearance.
2. Can I use liquid food coloring instead of gel?
You can, but gel works better. Liquid coloring may alter dough consistency and produce a duller red.
3. Why didn’t my cookies crackle?
Warm dough or insufficient powdered sugar cause weak crinkles. Chill the dough longer and coat generously next time.
4. Can I make the dough ahead of time?
Absolutely. Make the dough 24 hours in advance and keep it chilled until you’re ready to roll and bake.
5. Can I freeze the dough?
Yes. Freeze rolled dough balls (before coating in sugar) on a tray, then transfer to freezer bags. Thaw slightly, roll in sugars, and bake as directed.
This Perfect Red Velvet Crinkle Cookies recipe is comfort food at its finest — soft, chewy, cocoa-rich, and coated in snowy sweetness that makes every bite feel celebratory. It’s the kind of dish that turns holiday platters, classroom parties, and Valentine dessert boxes into something special.