
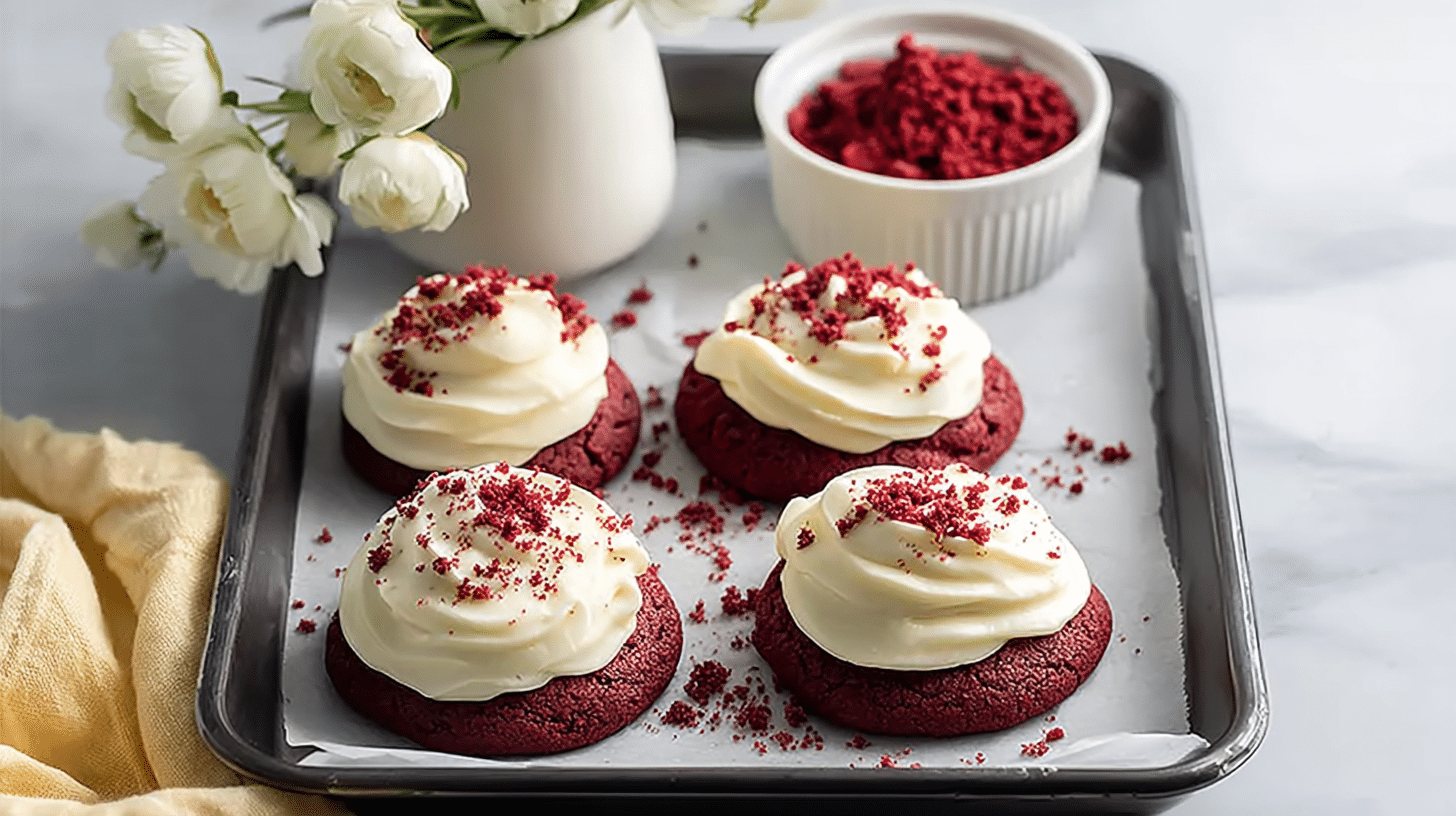
Soft, rich, and beautifully cocoa-kissed, these cookies deliver a bakery-style experience straight from your kitchen. Classic Crumbl Copycat Red Velvet Cookies feature that iconic crimson hue, a tender center, and a luxurious cream cheese frosting that melts on your tongue. This recipe captures what makes the original so irresistible while keeping the process simple enough for any home baker. If you love thick gourmet cookies with a flavorful twist, you’re in for a treat. In this guide, you’ll learn how to make Classic Crumbl Copycat Red Velvet Cookies, how to frost them like a pro, and how to customize them for any occasion.
Why You’ll Love This Recipe
There are countless reasons to fall hard for Classic Crumbl Copycat Red Velvet Cookies, especially if you’re a fan of bakery-style red velvet desserts. First, the texture is unreal: thick cookie bases with a soft center, slight chew, and velvety smooth frosting that contrasts beautifully with the cocoa notes underneath. The pairing of tangy cream cheese frosting and subtle chocolate flavor feels indulgent and balanced rather than overly sweet.
Another reason people adore this recipe is its reliability and simplicity. You don’t need specialty equipment or expensive ingredients—just a mixing bowl, a baking sheet, and common pantry staples. If you’ve ever made chocolate crinkle cookies or bakery-style chocolate chip cookies, this will feel equally approachable. Despite the gourmet look, each batch comes together quickly, and the frosting spreads like silk over the warm cookies. Plus, these cookies are perfect for holidays, birthdays, bake sales, or gifting because they hold their shape well and look stunning with their deep red color and white frosting swirl.
If you enjoy baking cookies inspired by Crumbl’s menu or copycat bakery cookies, this recipe gives you that experience at home without waiting in line or paying premium prices.
Ingredients
To make a dozen large Classic Crumbl Copycat Red Velvet Cookies, gather the following:
1/2 cup (113 g) unsalted butter, softened — for richness and structure
1/2 cup (100 g) granulated sugar
1/2 cup (110 g) light brown sugar — adds moisture and chew
1 large egg (50 g) at room temperature — binds and adds volume
1 tsp (5 ml) vanilla extract — enhances flavor
1 tbsp (15 ml) red food coloring — for that signature velvet red
1 3/4 cups (210 g) all-purpose flour
1/4 cup (25 g) natural cocoa powder — mild chocolate backbone
1 teaspoon baking soda
1/4 teaspoon baking powder
1/2 teaspoon fine salt
Cream Cheese Frosting:
4 oz (113 g) cream cheese, softened
4 tbsp (56 g) unsalted butter, softened
1 1/2 cups (180 g) powdered sugar
1 tsp (5 ml) vanilla extract
Pinch of salt for balance
These measured ingredients ensure the cookies achieve the ideal height, flavor, and frosting consistency without guesswork. The mild cocoa plus red coloring gives the classic red velvet profile that differs from fully chocolate-based cookies like chocolate lava cookies.
Pro Tips
Cream butter and sugar properly: Spend at least 2–3 minutes creaming your butter with both sugars until it becomes pale and fluffy. This step helps incorporate air into the dough so your Classic Crumbl Copycat Red Velvet Cookies bake tall instead of flat. Many home bakers rush this stage, but proper aeration is key for thick bakery-style cookies.
Chill the dough before baking: While not strictly required, chilling for 20–30 minutes firms the fats so they melt slower in the oven. This creates that signature thick cookie look similar to gourmet bakery cookies. If your kitchen runs warm, dough chilling prevents overly spread cookies and improves consistency—especially important for variations like red velvet chocolate chip cookies or double chocolate cookies.
Frost when slightly warm: Instead of waiting for full cooling, spread cream cheese frosting when cookies are just mildly warm. This allows the frosting to settle and meld with the cookie’s surface, giving a creamy bite rather than a separate frosting layer. The final texture becomes soft, cohesive, and luxurious, much like premium bakery red velvet brownies topped with whipped cheese frosting.
Instructions
Step 1: Prepare your equipment
Preheat the oven to 350°F (175°C). Line your baking sheets with parchment paper to prevent sticking and ensure even bottoms. Position the racks in the center of the oven so your cookies receive consistent heat.
Step 2: Cream the butter and sugars
In a large mixing bowl, beat the softened butter with granulated sugar and brown sugar. Use a hand mixer or stand mixer fitted with a paddle attachment. Mix on medium speed for 2–3 minutes until the mixture turns light and fluffy. Scrape down the bowl once halfway to ensure even mixing.
Step 3: Add wet ingredients
Add the egg and vanilla extract. Mix on medium until fully combined. Add the red food coloring next. The dough should look uniformly red, without streaks. If needed, add a bit more coloring to deepen the hue. You want the color to remain vibrant even after cocoa powder darkens it slightly.
Step 4: Combine dry ingredients
In a separate bowl, whisk together flour, cocoa powder, baking soda, baking powder, and salt. Whisking breaks up clumps and evenly distributes the leaveners for consistent baking.
Step 5: Mix wet and dry ingredients
Add the dry mixture to the wet mixture in two additions, mixing on low speed until no flour remains. Avoid overmixing; stop as soon as the dough comes together. Overmixing strengthens gluten and can make cookies tough.
Step 6: Portion the dough
Use a large cookie scoop (about 1/4 cup size) to form dough balls. Place them on the prepared baking sheets with at least 2 inches between each cookie. For authentic bakery-like thickness, gently flatten the tops without pressing too much.
Step 7: Bake the cookies
Bake for 10–12 minutes or until the tops are set but still soft in the center. The cookies will continue to set from residual heat. Do not wait for firm edges—red velvet cookies should stay plush and tender.
Step 8: Make the frosting
While cookies bake, beat softened cream cheese and butter in a bowl until smooth. Add powdered sugar gradually and beat until creamy. Add vanilla extract and a pinch of salt to enhance flavor and control sweetness.
Step 9: Cool and frost
Let cookies rest on the pan for 10 minutes before transferring to a cooling rack. Once they’re warm, not hot, frost each one generously. You can pipe in swirls for a bakery look or spread with an offset spatula for a rustic presentation.
Your cookies are ready to taste! Each bite should deliver soft red velvet goodness paired with silky frosting, just like Crumbl’s famous red velvet menu cookies.

Variations
Chocolate chip version: Add 1 cup (175 g) white chocolate chips or dark chocolate chips to your dough before baking. White chocolate pairs beautifully with red velvet and gives a flavor similar to red velvet brownies with white chocolate chunks.
Stuffed version: For an indulgent twist, freeze cream cheese filling portions (made from cream cheese, powdered sugar, and vanilla) into small disks. Wrap cookie dough around each frozen filling piece before baking for molten cream cheese centers.
Gluten-free adaptation: Swap all-purpose flour for a cup-for-cup gluten-free flour blend with xanthan gum. Texture will still be rich and tender, especially if you don’t skip the cookie chilling step. The frosting stays naturally gluten-free.
Storage/Serving
These cookies store wonderfully thanks to their soft crumb and rich frosting. Place frosted cookies in a single layer in airtight containers and refrigerate for up to 4 days. If stacking, add parchment between layers to prevent sticking. To serve from the fridge, allow cookies to come to room temperature for 15–20 minutes so the frosting softens.
For longer storage, freeze unfrosted cookies for up to 2 months in freezer bags. Thaw at room temperature, then frost fresh for best texture. You can also freeze frosted cookies individually, though the frosting will firm up slightly.
Serving suggestions are plentiful: present them on dessert platters for holidays, pack in bakery boxes for gifting, or enjoy alongside coffee, hot chocolate, or cold milk. Their bakery-style look makes them ideal party desserts, especially for Valentine’s Day, Christmas, birthdays, or any event where gourmet cookies shine.
FAQs
1. Do I need red food coloring for this recipe?
Yes, red food coloring gives Classic Crumbl Copycat Red Velvet Cookies their signature color. Without it, they’ll taste the same but look more like mild chocolate cookies.
2. Can I double the recipe?
Absolutely. This recipe scales well. Just ensure you chill the dough slightly if you’re making very large batches to keep cookie thickness consistent.
3. Can I make these without cream cheese frosting?
You can, but the tangy frosting balances sweetness and enhances the red velvet flavor. Without frosting, the cookies resemble soft chocolate cookies.
4. What cocoa powder works best?
Natural unsweetened cocoa powder gives authentic red velvet flavor. Dutch-processed cocoa darkens the dough and creates a more intense chocolate character, similar to chocolate sandwich cookie-style red velvet cookies.
5. Why did my cookies spread too much?
Warm dough and warm pans are common causes. Chill dough, use room-temperature butter rather than melted butter, and place dough on cool baking sheets.
Conclusion
This Classic Crumbl Copycat Red Velvet Cookies recipe is comfort food at its finest — soft, thick cookies crowned with silky cream cheese frosting that makes every bite unforgettable. It’s the kind of dish that elevates celebrations, makes holidays sweeter, and turns ordinary days into delicious memories.