
Introduction
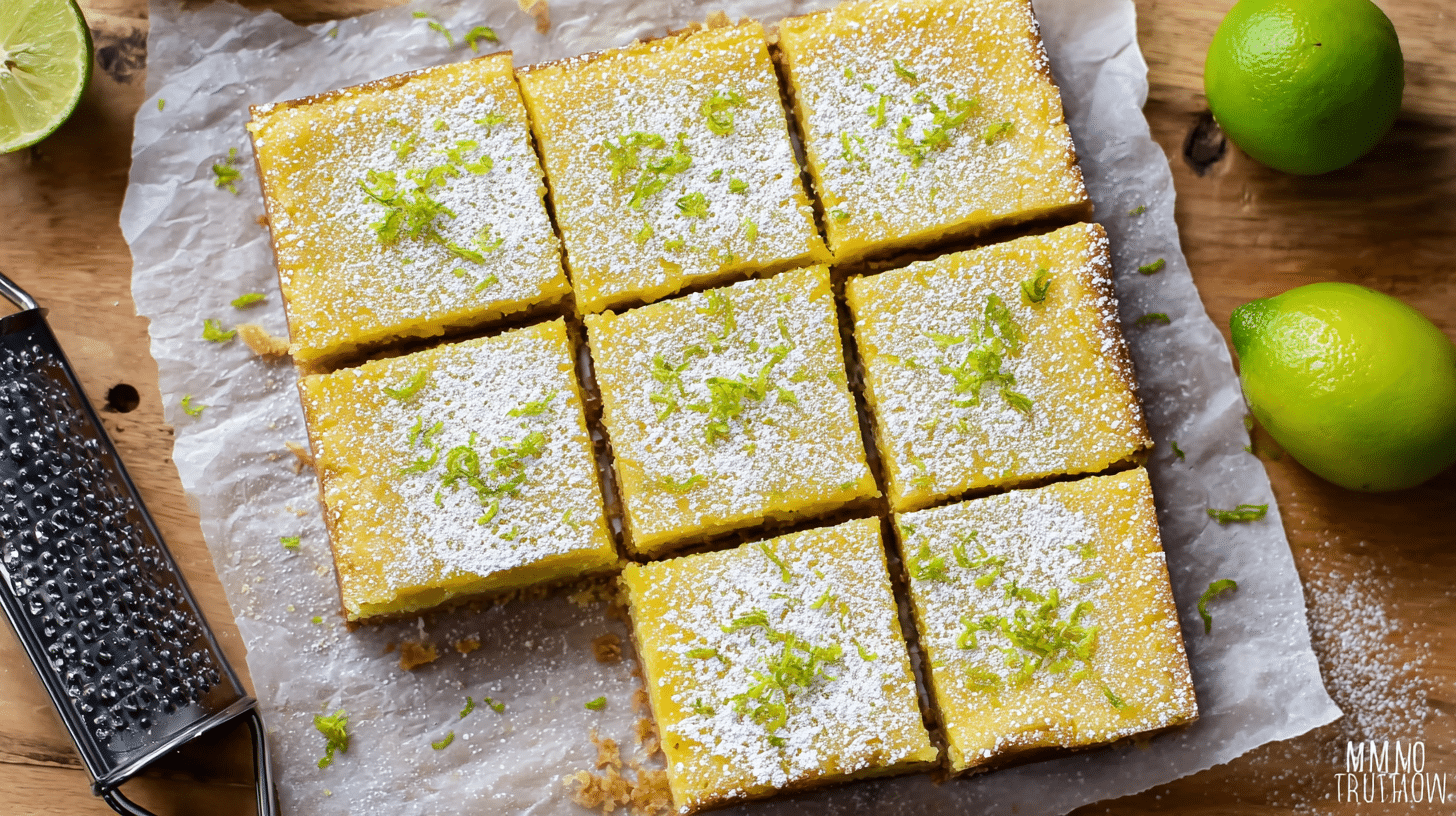
Bright, creamy, and lusciously tangy, these Easy Key Lime Pie Bars – Creamy & Refreshing Dessert deliver everything you love about classic key lime pie in a handheld treat. Each bite balances silky citrus filling with a buttery, golden crust that melts just slightly under your teeth. If you’ve been searching for a dessert that feels light yet indulgent, this is it. These Easy Key Lime Pie Bars – Creamy & Refreshing Dessert are perfect for summer gatherings, holidays, or whenever you need a refreshing sweet bite. You’ll learn how to create a perfectly smooth filling, a crisp crust, and bakery-style bars that slice beautifully every time.
Why You’ll Love This Recipe
There’s something instantly uplifting about these Easy Key Lime Pie Bars – Creamy & Refreshing Dessert. The filling is smooth, creamy, and bursting with bright citrus flavor that wakes up your taste buds without feeling heavy. The buttery graham cracker crust adds a warm, toasty crunch that contrasts beautifully with the silky lime layer.
Unlike traditional pies, these bars are simple to slice, serve, and share—no messy cutting or fragile crusts to worry about. They’re also more portable, making them perfect for picnics, potlucks, or casual gatherings.
You’ll love how quickly they come together with basic pantry ingredients. The flavor leans sweet-tart, with just enough richness from condensed milk to balance the sharp lime juice. If you enjoy desserts like lemon bars or citrus cheesecake squares, this recipe gives you a similar experience with a tropical twist. These Easy Key Lime Pie Bars – Creamy & Refreshing Dessert bring brightness, creaminess, and ease together in one irresistible bite.
Ingredients
To make these Easy Key Lime Pie Bars – Creamy & Refreshing Dessert, you only need a handful of simple ingredients that create big flavor.
For the crust, you’ll use about 1 ½ cups (150 g) of graham cracker crumbs, combined with 6 tablespoons (85 g) melted unsalted butter and 2 tablespoons (25 g) granulated sugar. This mixture forms a crisp, slightly sweet base that supports the creamy filling.
For the filling, you’ll need 1 can (14 oz / 397 g) sweetened condensed milk, 4 large egg yolks, ½ cup (120 ml) fresh key lime juice (or regular lime juice if needed), and 1 tablespoon lime zest for extra brightness. The condensed milk gives richness while the lime juice provides that signature tang.
For topping, optional whipped cream made from 1 cup (240 ml) heavy cream and 2 tablespoons powdered sugar adds a soft, airy contrast.
These simple ingredients come together to create perfectly balanced Easy Key Lime Pie Bars – Creamy & Refreshing Dessert with a smooth, tangy center and a crisp crust.
Pro Tips
First, always use fresh lime juice when making these Easy Key Lime Pie Bars – Creamy & Refreshing Dessert. Bottled juice lacks brightness and can make the filling taste dull or artificial. Fresh juice gives you that clean, vibrant citrus flavor that defines the dessert.
Second, don’t overbake the filling. The bars should look set at the edges but still slightly jiggly in the center when you remove them from the oven. They will continue to firm up as they cool, giving you a creamy texture instead of a dry or rubbery one.
Third, chill the bars completely before slicing. Refrigerating for at least four hours—or overnight if possible—helps the layers set firmly. This makes cutting cleaner and ensures the crust holds together beautifully. For the cleanest slices, use a sharp knife wiped with a warm cloth between cuts.
These small techniques make a big difference in achieving bakery-quality Easy Key Lime Pie Bars – Creamy & Refreshing Dessert every time.
Instructions
Step 1: Prepare the Crust
Preheat your oven to 175°C (350°F). In a bowl, combine graham cracker crumbs, sugar, and melted butter until the mixture resembles wet sand. Press it firmly into a parchment-lined 8×8-inch baking pan. Make sure the layer is even and compact so it holds together after baking. Bake for 8–10 minutes until lightly golden, then set aside to cool slightly. This step builds the foundation for your Easy Key Lime Pie Bars – Creamy & Refreshing Dessert.
Step 2: Make the Filling
In a mixing bowl, whisk together egg yolks and sweetened condensed milk until smooth and slightly thickened. Slowly add fresh lime juice while whisking continuously. The mixture will thicken naturally as the citrus reacts with the condensed milk. Stir in lime zest for extra aroma and brightness. This creamy filling is what gives the Easy Key Lime Pie Bars – Creamy & Refreshing Dessert their signature texture.
Step 3: Assemble and Bake
Pour the filling over the pre-baked crust and spread it evenly using a spatula. Bake for 15–18 minutes, just until the edges are set. The center should still have a gentle wobble. Avoid overbaking to maintain a silky texture. Once done, remove from the oven and let it cool at room temperature.
Step 4: Chill Completely
Refrigerate the bars for at least 4 hours, preferably overnight. This step is essential for clean slicing and proper texture. The flavors of the Easy Key Lime Pie Bars – Creamy & Refreshing Dessert also deepen as they chill.
Step 5: Slice and Serve
Lift the chilled bars from the pan using parchment paper. Cut into squares using a sharp knife. Wipe the blade between cuts for neat edges. Add whipped cream on top if desired and serve cold for the best experience.
Variations
You can easily customize these Easy Key Lime Pie Bars – Creamy & Refreshing Dessert to suit different tastes. For a tropical twist, add shredded coconut to the crust or sprinkle toasted coconut on top. This adds texture and enhances the island-inspired flavor.
For a richer version, swap half the lime juice with lemon juice to create a citrus blend that’s slightly less tangy but more complex. This variation is great for those who prefer milder acidity.
If you want a gluten-free option, use almond flour or gluten-free graham crackers for the crust. The texture will still be deliciously crumbly and supportive.
You can also turn these bars into mini cupcake-style desserts by baking them in a muffin tin. This makes the Easy Key Lime Pie Bars – Creamy & Refreshing Dessert even more portable for parties and events.
Storage/Serving
Store your Easy Key Lime Pie Bars – Creamy & Refreshing Dessert in an airtight container in the refrigerator for up to 5 days. Keep them chilled to maintain their creamy texture and firm structure. Avoid leaving them at room temperature for long periods, especially in warm weather.
For longer storage, freeze the bars individually wrapped for up to 2 months. Thaw them in the refrigerator overnight before serving.
These bars pair beautifully with fresh berries, a dollop of whipped cream, or even a drizzle of white chocolate. For a refreshing dessert spread, serve them alongside fruit salads or tropical desserts. They also work well as a light finish after grilled meals or seafood dishes.
FAQs
Can I use regular limes instead of key limes?
Yes, regular limes work perfectly if key limes are unavailable. The flavor will be slightly less floral but still delicious in these Easy Key Lime Pie Bars – Creamy & Refreshing Dessert.
Why is my filling not setting?
This usually happens if the bars are underbaked or not chilled long enough. Always bake until the edges are set and chill for several hours.
Can I make these ahead of time?
Absolutely. These bars taste even better the next day after the flavors have fully developed.
Do I need to strain the lime juice?
It’s optional, but straining removes pulp and seeds, giving you a smoother filling.
Can I double the recipe?
Yes, simply use a 9×13-inch pan and adjust baking time slightly for a larger batch.
Conclusion
This Easy Key Lime Pie Bars – Creamy & Refreshing Dessert is comfort food at its finest — a perfect balance of tangy citrus and smooth, creamy sweetness layered over a buttery crust. It’s the kind of dish that brings instant sunshine to any table, whether you’re serving it at a summer gathering or enjoying a quiet moment at home. With its refreshing flavor and simple preparation, this dessert proves that impressive treats don’t need to be complicated.