
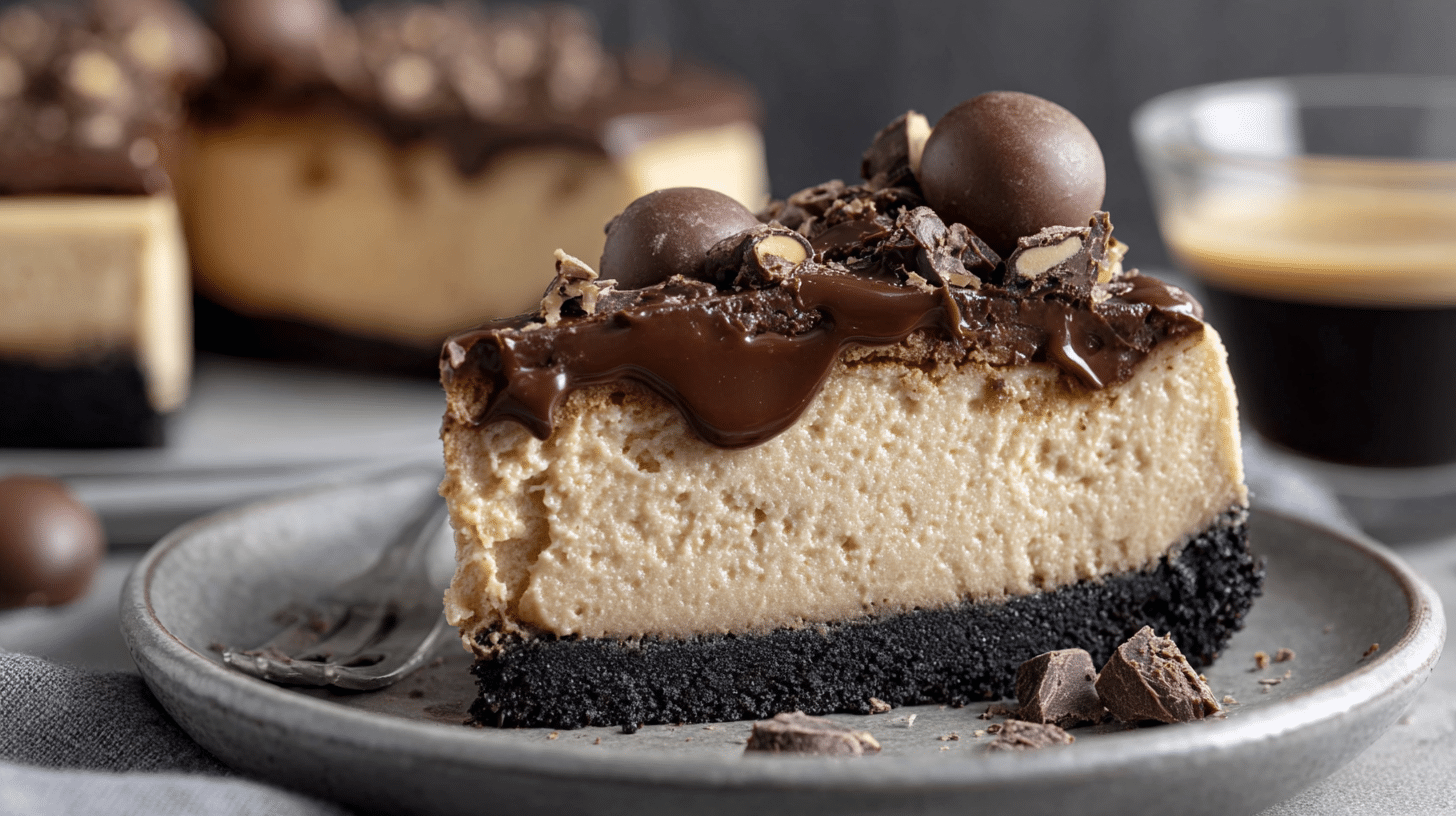
Silky, aromatic, and irresistibly creamy, Espresso Cheesecake delivers the rich flavor of a café-style espresso shot wrapped inside a luscious New York–style cheesecake. This dessert stands out because it blends bold coffee notes with a velvety cream cheese base for the perfect balance of bitter and sweet. Many cheesecakes tend to lean sugary, but Espresso Cheesecake brings depth, nuance, and that unmistakable roasted-coffee aroma. In this article, you’ll learn how to master a bakery-quality Espresso Cheesecake, how to avoid cracking, how to modify the flavor strength, and how to serve it like a pro. You’ll learn…
Why You’ll Love This Recipe
If you’re a coffee lover, this recipe checks every box. The flavors of Espresso Cheesecake feel sophisticated but comforting, like a dessert you’d order at a high-end café. Each slice features a buttery cookie crust, a smooth espresso-infused filling, and a glossy whipped cream topping that cuts through the richness. Texture matters, and here you get multiple layers of contrast: crisp crust, creamy center, and airy topping. Each bite melts, while the espresso flavor lingers pleasantly rather than overwhelming your palate.
Another reason you’ll love this recipe is its flexibility. You can make the espresso as intense or subtle as you want, adjust the topping, or even take the filling in a mocha direction if you prefer chocolate plus coffee. Compared to complex layer cakes, this dessert feels surprisingly straightforward to execute. With a few key techniques, you’ll produce a crack-free, ultra-smooth cheesecake that impresses guests and satisfies every sweet tooth.
Whether you’re celebrating a birthday, hosting dinner, or just craving your favorite café flavors at home, this Espresso Cheesecake rises to the occasion effortlessly. A single cheesecake slices beautifully into eight or more servings, making it ideal for sharing and entertaining.
Ingredients
To make this Espresso Cheesecake, gather the following ingredients. Measurements are exact to help ensure the perfect texture and consistency:
For the crust:
2 cups (200g) chocolate cookie crumbs or graham crumbs
1/4 cup (50g) granulated sugar
1/2 cup (115g) unsalted butter, melted
For the filling:
24 oz (680g) full-fat cream cheese, softened
1 1/4 cups (250g) granulated sugar
3 large eggs, room temperature
1 cup (240g) sour cream
1 tbsp vanilla extract
2 tbsp instant espresso powder dissolved in 1/4 cup (60ml) hot water (cooled)
1 tbsp cornstarch (for stability)
For the topping:
1 cup (240ml) heavy whipping cream
2 tbsp powdered sugar
Cocoa powder or chocolate shavings for garnish
Using full-fat dairy is key because it helps the cheesecake stay dense, rich, and creamy. The instant espresso powder gives the filling a concentrated coffee flavor without adding too much liquid, ensuring the structure stays firm.
Pro Tips
To create the perfect Espresso Cheesecake, use these three pro techniques that elevate your results instantly:
Use Room Temperature Ingredients
Cold dairy leads to lumpy batter and uneven baking. Let your cream cheese, eggs, and sour cream come to room temperature before mixing. This ensures the filling whips smoothly without pockets of unmixed cream cheese. Smooth batter equals a smoother baked cheesecake with fewer cracks.Water Bath = No Cracks
Cheesecakes love gentle, moist heat. Wrap your springform pan in aluminum foil and place it inside a larger roasting pan filled halfway with hot water. The steam stabilizes the custard-like filling and prevents the top from drying out. This method helps your Espresso Cheesecake bake evenly, without puffing or cracking.Cool Gradually
Rapid temperature changes are the number-one cause of cracked cheesecakes. After baking, turn the oven off and crack the door, letting the cheesecake cool slowly for an hour. Then remove it, let it reach room temperature, and finally refrigerate it. This slow cool-down keeps the texture velvety and eliminates structural stress.
Instructions
Bold steps included as required:
(Step 1) Prepare Your Pan
Preheat the oven to 325°F (165°C). Wrap the outside of a 9-inch (23cm) springform pan with heavy-duty aluminum foil. This prevents any water from entering during the water bath. Lightly grease the inside of the pan with butter or baking spray.
(Step 2) Make the Crust
Combine the cookie crumbs, granulated sugar, and melted butter in a medium bowl. Stir until the mixture resembles wet sand. Press the crumbs firmly into the bottom of your springform pan, using the bottom of a glass to create an even layer. Slide the pan into the oven and bake for 8 minutes. Remove and let it cool while prepping the filling.
(Step 3) Prepare the Espresso Filling
Using a stand mixer or hand mixer, beat the softened cream cheese on medium speed for 2 minutes until smooth and free of lumps. Add the granulated sugar and mix again for 1 minute. Scrape down the sides with a spatula. Add the sour cream, dissolved espresso mixture, vanilla, and cornstarch. Mix until combined, but do not whip vigorously—too much air creates bubbles. Add the eggs one at a time, mixing slowly after each addition until just incorporated.
(Step 4) Fill and Set Up Water Bath
Pour the filling over the cooled crust. Tap the pan gently on the counter to pop any air bubbles. Place the springform pan inside a larger roasting pan, then pour hot water into the roasting pan until it reaches halfway up the sides of the springform pan.
(Step 5) Bake the Cheesecake
Place the pans in the oven and bake for 60 to 70 minutes. You want the edges set and the center slightly jiggly, like set gelatin. Avoid opening the oven during the first 50 minutes, as this can cause sinking.
(Step 6) Cool Properly
Turn off the oven, crack the door, and let the cheesecake cool inside for 1 hour. Remove the pan from the water bath, remove foil, and place the cheesecake on a cooling rack until it reaches room temperature. Once cooled, place it in the refrigerator for at least 6 hours or overnight. This rest time allows the flavors of Espresso Cheesecake to deepen.
(Step 7) Add Topping and Garnish
When chilled and firm, whip the heavy cream with powdered sugar until medium peaks form. Spread or pipe it onto the top of the cheesecake. Finish with a dusting of cocoa powder or chocolate shavings. Slice with a warm knife for clean edges.
Variations
One joy of Espresso Cheesecake is how easily it adapts to different flavor profiles and dietary needs:
Mocha Cheesecake: Add 1 cup (175g) melted semi-sweet chocolate to the filling before baking. The result resembles mocha ricotta cheesecake bars in flavor, balancing chocolate and espresso for true mocha lovers.
Coffee Cheesecake Bars: Instead of baking in a round springform pan, press the crust into a 9×13 baking pan and bake for 50-55 minutes. Chill, slice into squares, and serve as portable cheesecake bars for parties or coffee shop-style treats.
Gluten-Free Version: Swap the cookie crumbs with gluten-free chocolate cookies and confirm cornstarch is certified gluten-free. The results still taste decadent and rich, with no compromise in texture.
Storage/Serving
Store your Espresso Cheesecake in the refrigerator, covered tightly with plastic wrap or in an airtight container. It keeps fresh for up to 5 days. For longer storage, freeze the cheesecake (without whipped topping) for up to 2 months. Wrap it first in plastic, then in foil. Thaw overnight in the fridge before serving.
To serve like a pro, add toppings right before plating. A swirl of homemade whipped cream, chocolate curls, or a drizzle of coffee syrup transforms it into café-style dessert elegance. Pair slices with hot espresso, cappuccino, or even a mild dessert wine for a fully elevated experience. The bitterness of coffee or espresso cuts through the richness and enhances the cheesecake’s deep flavor profile.
For brunches, birthdays, or dinner parties, you can pre-cut slices and place them on individual plates with a light dusting of cocoa for extra presentation flair.
FAQs
1. Can I use brewed coffee instead of espresso?
Yes, but espresso creates a stronger and more concentrated flavor. If using coffee, reduce the added liquid to avoid thinning the batter and weaken the structure.
2. How do I prevent cheesecake cracks?
Use a water bath, avoid overmixing, and cool the cheesecake slowly. These three tips drastically reduce cracks and maintain a creamy top.
3. Can I make this cheesecake without sour cream?
You can substitute full-fat Greek yogurt. It adds tang but keeps the texture rich and creamy.
4. How strong is the espresso flavor?
The espresso flavor in Espresso Cheesecake is bold but balanced. Increase or decrease espresso powder depending on your taste preference.
5. Is instant espresso required?
Instant espresso powder dissolves quickly and produces strong flavor without excess liquid. Regular ground espresso won’t dissolve the same way and can lead to grainy texture.
This Espresso Cheesecake is comfort food at its finest creamy, bold, and kissed with the aromatic depth of café-quality espresso. It’s the kind of dish that elevates a dinner party, brightens a brunch table, or rewards you after a long week with a slice of pure indulgence.