
Introduction
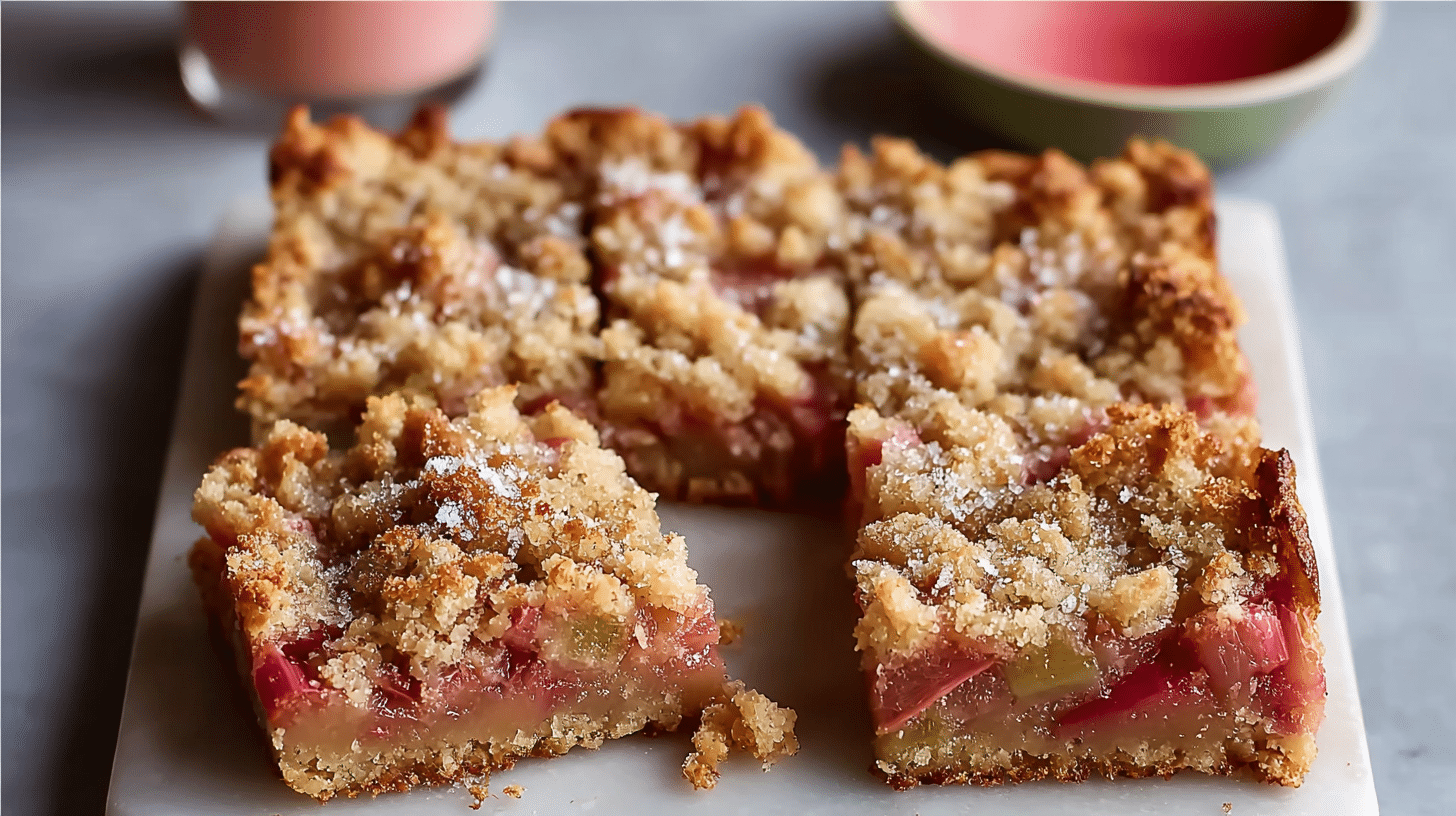
Buttery, tangy, and delicately sweet, Homemade Rhubarb Dream Bars offer a nostalgic dessert experience with a modern twist. The crisp shortbread base pairs beautifully with a creamy rhubarb filling that melts in your mouth, creating a perfect balance of texture and flavor. This dessert stands out for its vibrant tartness and soft, custard-like topping. Whether you bake for family gatherings or casual weekends, these bars always impress. You’ll learn how to create bakery-quality bars with simple ingredients and foolproof techniques.
Why You’ll Love This Recipe
There’s something irresistible about Homemade Rhubarb Dream Bars that keeps people coming back for more. The contrast between the buttery crust and the silky rhubarb layer delivers a satisfying bite every time. You get a gentle crunch followed by a smooth, tangy finish that feels light yet indulgent.
This recipe also shines because of its simplicity. You don’t need advanced baking skills to achieve great results. The steps stay straightforward, and the ingredients remain accessible. If you love classic rhubarb dessert bars or enjoy fruity dessert squares, this recipe fits perfectly into your baking routine.
Another reason to love these bars lies in their versatility. Serve them as an afternoon treat, a picnic dessert, or even a sweet brunch addition. The balance of sweet and tart flavors makes them refreshing rather than overly rich.
Ingredients
To make Homemade Rhubarb Dream Bars, gather these ingredients:
- 1 cup (225 g) unsalted butter, softened – creates a rich, tender crust
- 2 cups (250 g) all-purpose flour – provides structure
- 1/2 cup (100 g) granulated sugar – lightly sweetens the base
- 2 cups (240 g) chopped fresh rhubarb – adds tart, fruity flavor
- 2 large eggs – bind the filling and add creaminess
- 1 1/2 cups (300 g) granulated sugar – sweetens the rhubarb layer
- 1/4 cup (30 g) all-purpose flour – thickens the filling
- 1 tsp vanilla extract – enhances overall flavor
- Pinch of salt – balances sweetness
For a variation like creamy rhubarb dessert bars, you can add a splash of cream to the filling for extra richness.
Pro Tips
Perfecting Homemade Rhubarb Dream Bars depends on a few essential techniques.
First, chill the crust before baking. After pressing the dough into the pan, refrigerate it for about 15 minutes. This step helps maintain a firm, crisp base and prevents shrinking during baking.
Second, use fresh rhubarb whenever possible. Fresh stalks provide the best texture and natural tartness. If you use frozen rhubarb, thaw and drain it thoroughly to avoid excess moisture that can make the filling soggy.
Third, avoid overbaking the filling. The center should set but still have a slight jiggle when you remove it from the oven. This ensures a soft, custard-like texture once cooled. Overbaking can lead to a dry or rubbery layer.
Instructions
Step-by-Step Instructions
Step 1
Preheat your oven to 350°F (175°C). Line a 9×13-inch baking pan with parchment paper for easy removal.
Step 2
In a mixing bowl, combine softened butter, 2 cups flour, and 1/2 cup sugar. Mix until the dough forms a crumbly texture. Press it evenly into the prepared pan to create the crust.
Step 3
Refrigerate the crust for 15 minutes, then bake for 15–18 minutes until lightly golden. This forms the sturdy base for your Homemade Rhubarb Dream Bars.
Step 4
While the crust bakes, prepare the filling. In a separate bowl, whisk eggs, 1 1/2 cups sugar, 1/4 cup flour, vanilla extract, and salt until smooth.
Step 5
Fold in the chopped rhubarb, ensuring it distributes evenly throughout the mixture.
Step 6
Pour the filling over the warm crust. Spread it gently so it reaches all corners of the pan.
Step 7
Return the pan to the oven and bake for 35–40 minutes. The filling should set with a slight wobble in the center.
Step 8
Remove from the oven and let cool completely at room temperature. This step helps the layers firm up properly.
Step 9
Once cooled, lift the bars out using parchment paper and slice into squares. Serve and enjoy your perfectly balanced bars.
Variations
You can easily customize Homemade Rhubarb Dream Bars to suit different tastes.
For a strawberry rhubarb version, mix in 1 cup of chopped strawberries with the rhubarb. This adds natural sweetness and softens the tartness, creating strawberry rhubarb bars that many people love.
If you prefer a gluten-free option, substitute the all-purpose flour with a gluten-free baking blend. Make sure it contains a binding agent for best results.
For a richer twist, add shredded coconut or white chocolate chips to the filling. These additions create a more indulgent texture and pair beautifully with the tangy rhubarb.
Storage and Serving
Store your Homemade Rhubarb Dream Bars in an airtight container in the refrigerator for up to 4 days. Chilling helps maintain their structure and enhances the flavor.
When serving, you can enjoy them cold for a firmer texture or let them sit at room temperature for a softer bite. These bars taste fantastic on their own, but you can elevate them with a dusting of powdered sugar.
For special occasions, serve them with a scoop of vanilla ice cream or a dollop of whipped cream. The cool creaminess complements the tangy filling perfectly, creating a balanced dessert experience.
FAQs
1. Can I use frozen rhubarb?
Yes, but thaw and drain it thoroughly to remove excess moisture before using.
2. Why is my filling too runny?
The bars may need more baking time or cooling time. The filling firms up as it cools.
3. Can I make Homemade Rhubarb Dream Bars ahead of time?
Absolutely. They store well and taste even better the next day.
4. Do I need to peel rhubarb?
No, simply wash and trim the stalks before chopping.
5. Can I reduce the sugar?
You can slightly reduce it, but keep in mind that rhubarb is naturally very tart.
Conclusion
This Homemade Rhubarb Dream Bars is comfort food at its finest — buttery, tangy, and perfectly balanced with a soft, custard-like topping. It’s the kind of dish that brightens gatherings, satisfies sweet cravings, and showcases seasonal rhubarb in the most delicious way.