
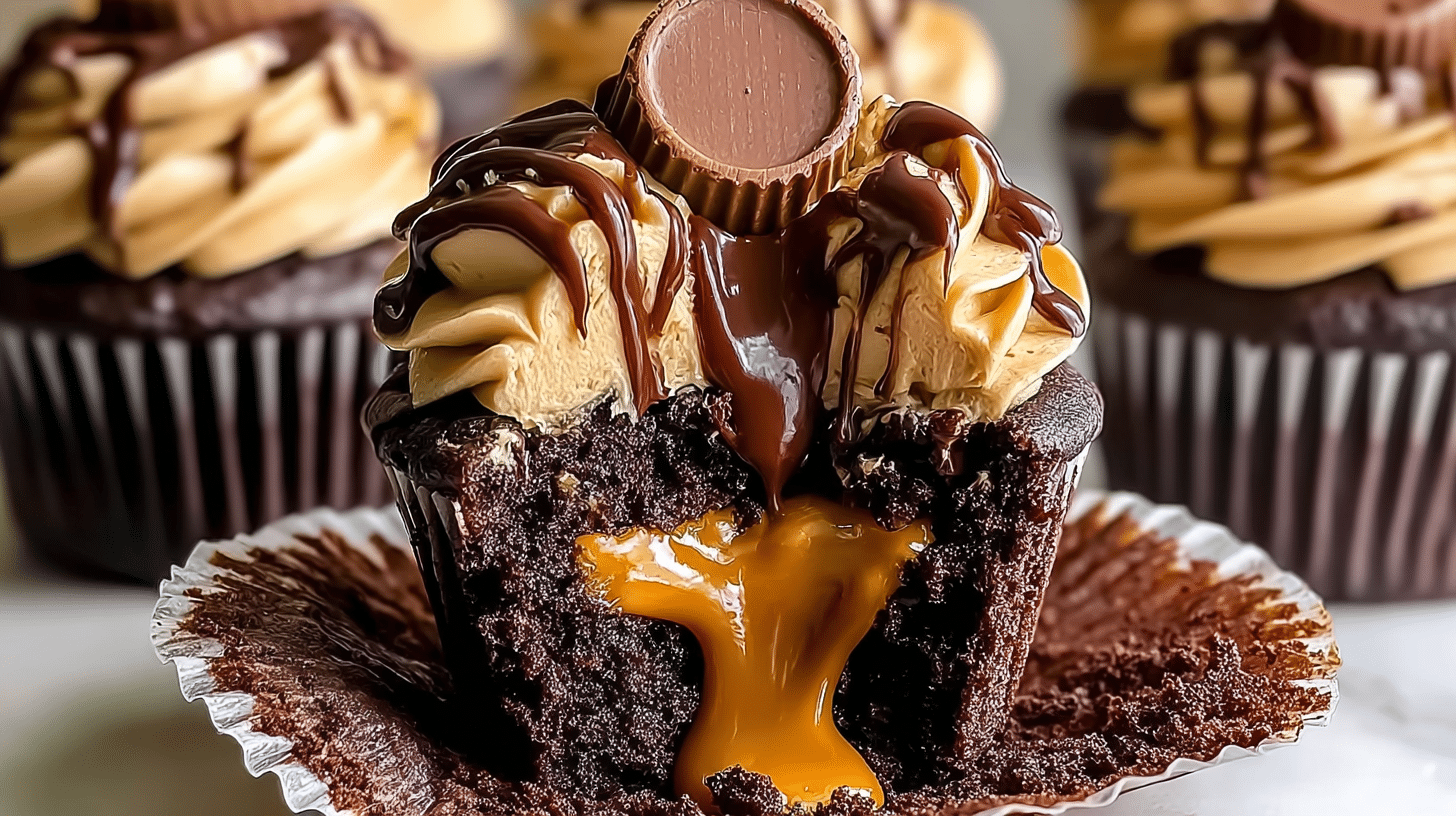
Warm, fudgy, and irresistibly gooey, Peanut Butter Brownie Cups deliver the perfect blend of chocolate richness and nutty creaminess in every bite. With crisp edges, molten centers, and a swirl of creamy peanut butter, these portable treats taste like your favorite dessert upgraded. What makes Peanut Butter Brownie Cups extra special is how quickly they bake and how elegantly they present. Whether you serve them for parties or weeknight cravings, they always impress. In this recipe, you’ll learn how to create bakery-style Peanut Butter Brownie Cups, how to customize them, and how to store them for maximum freshness.
Why You’ll Love This Recipe
There’s a lot to adore about Peanut Butter Brownie Cups, and it starts with the way the textures play together. You get tender brownie centers that melt on your tongue, contrasted by slightly crisp edges and a smooth peanut butter core. Every cup feels indulgent but balanced, and the peanut butter adds both flavor and moisture. Chocolate lovers appreciate the deep cocoa flavor, while nut butter fans love how it enhances the whole experience.
Beyond flavor and texture, these brownie cups win because they’re so easy. You don’t need special equipment, advanced baking skills, or hours of prep time. A muffin tin transforms the batter into perfectly portioned chocolate peanut butter bites without effort. They also freeze beautifully, making them ideal for meal prep and events. Finally, you can adapt the recipe for dietary needs, switch up fillings like hazelnut spread, or turn them into festive holiday treats. With Peanut Butter Brownie Cups, you get versatility, convenience, and unforgettable flavor in one effortless dessert.
Ingredients
To make Peanut Butter Brownie Cups, gather the following ingredients using accurate measurements for consistent results. This recipe uses common pantry essentials plus high-quality chocolate and creamy peanut butter for the best texture.
8 oz (225 g) semisweet chocolate, finely chopped – melts easily for rich flavor.
1/2 cup (120 g) unsalted butter, softened – adds moisture and structure.
3/4 cup (150 g) granulated sugar – balances the cocoa bitterness.
1/2 cup (100 g) light brown sugar – deepens flavor and improves moistness.
2 large eggs (room temperature) – provides structure and lift.
1 tsp (5 ml) vanilla extract – enhances sweetness naturally.
3/4 cup (95 g) all-purpose flour – keeps brownies dense, not cakey.
1/3 cup (30 g) unsweetened cocoa powder – boosts chocolate intensity.
1/2 tsp (3 g) salt – sharpens overall flavor.
1/2 cup (125 g) creamy peanut butter – creates the signature peanut butter center.
These simple but high-impact ingredients work together to make deep chocolate flavor and velvety peanut butter filling in every single brownie cup.
Pro Tips
Baking perfect Peanut Butter Brownie Cups requires just a few strategic techniques to enhance flavor and texture.
Tip 1: Melt Chocolate Slowly for Smooth Texture
Chocolate burns easily, so melt it gently using a double boiler or short 15-second microwave bursts. Stir between intervals until smooth. This prevents scorching and gives your brownie batter a silky consistency that translates to rich flavor.
Tip 2: Do Not Overmix the Batter
Once you add flour and cocoa to the wet mixture, mix only until combined. Overmixing activates gluten, which creates tough or dry brownies instead of soft fudgy brownie cups. A quick fold keeps the texture tender.
Tip 3: Scoop Batter Evenly and Add Peanut Butter Correctly
Fill each muffin well about 3/4 full, then spoon a teaspoon of creamy peanut butter into the center. Gently press the peanut butter into the batter without fully burying it. This keeps the middle molten while ensuring the tops bake evenly.
Instructions
Follow these steps for foolproof Peanut Butter Brownie Cups every time.
Step 1: Preheat and Prep
Preheat your oven to 350°F (175°C). Lightly grease a standard 12-cup muffin tin or line it with paper liners. Preheating ensures the batter bakes evenly and develops crisp edges.
Step 2: Melt Chocolate and Butter
In a heat-safe bowl, combine chopped chocolate and butter. Melt using a double boiler, stirring continuously until glossy and smooth. Remove from heat and let it cool slightly to avoid scrambling eggs later.
Step 3: Mix Wet Ingredients
In a medium mixing bowl, whisk granulated sugar, brown sugar, eggs, and vanilla until the mixture becomes thick and pale. This creates structure and air pockets for better texture.
Step 4: Combine Chocolate and Wet Mixture
Pour the cooled melted chocolate mixture into the sugar-egg mixture. Use a rubber spatula to fold together until unified. The batter should look shiny and thick.
Step 5: Add Dry Ingredients
Sift flour, cocoa powder, and salt directly over the wet mixture. Fold gently until no streaks of flour remain. Avoid heavy stirring to maintain that classic dense brownie texture.
Step 6: Fill the Muffin Tin
Using a cookie scoop or spoon, portion the batter into the muffin cups, filling each about 3/4 full. This allows space for the peanut butter without overflowing during baking.
Step 7: Add Peanut Butter Centers
Place a small teaspoon of creamy peanut butter onto the center of each brownie cup. Press gently with the spoon so the peanut butter sinks slightly into the batter.
Step 8: Bake and Cool
Bake for 16–18 minutes, or until the tops look set and slightly crackly. The peanut butter may appear soft, which is perfect. Cool in the pan for 10 minutes before transferring to a wire rack. Cooling helps the cups firm up without drying out.
Your Peanut Butter Brownie Cups are ready to enjoy warm for molten centers or at room temperature for a denser texture.
Variations
You can adapt Peanut Butter Brownie Cups to suit different tastes, holidays, or dietary needs.
Chocolate Ganache Variation:
Add a spoonful of chocolate ganache over the peanut butter before baking to create ultra-rich layers similar to chocolate peanut butter bites. This variation appeals to serious chocolate fans.
Nut-Free Sunflower Version:
Swap creamy peanut butter for sunflower seed butter to create a nut-free option that still tastes indulgent and creamy. This is ideal for school events or nut-sensitive households.
Gluten-Free Brownie Cups:
Use a 1:1 gluten-free flour blend to maintain structure without sacrificing texture. Many gluten-free blends perform beautifully in dense bakes like brownie cups.
Storage/Serving
Store Peanut Butter Brownie Cups properly to maintain freshness and flavor.
For short-term storage, allow cups to cool fully and place them in an airtight container at room temperature for 3–4 days. They remain moist and flavorful without refrigeration. For longer storage, freeze them on a baking sheet, then transfer to a freezer-safe bag for up to 2 months. Thaw at room temperature before serving or warm for 10–12 seconds in the microwave for gooey centers.
These brownie cups serve beautifully in several ways:
Plate them warm with vanilla ice cream for a brownie sundae vibe.
Dust with powdered sugar for elegant presentation at parties.
Pair with cold milk or hot coffee for a dessert-like snack.
Whether you’re baking for gatherings or meal prep, Peanut Butter Brownie Cups always satisfy.
FAQs
1. Can I use boxed brownie mix?
Yes, boxed mix works, though from-scratch batter tastes richer. Prepare the mix as directed, fill muffin tins, and add peanut butter centers.
2. Can I use chunky peanut butter?
You can, but creamy peanut butter melts more evenly. Chunky versions add texture, similar to peanut butter brownie muffins.
3. How do I prevent them from sticking to the pan?
Use paper liners or grease the tin well. Allow cups to cool before removing to avoid breakage.
4. Should I refrigerate them?
Refrigeration isn’t required. Store at room temperature unless you prefer cold, firmer brownies.
5. How do I know when they are done?
Look for set tops with light cracks. A toothpick will come out with moist crumbs, not raw batter.
This Peanut Butter Brownie Cups recipe is comfort food at its finest deeply chocolaty with a creamy peanut butter center and just the right balance of textures. It’s the kind of dessert that satisfies warm-from-the-oven cravings, makes celebrations feel more special, and freezes beautifully for future treats.